Compass | Creating Service Package Templates For FDS Builder
Introduction
The following steps will guide you through how to define and upload your service package content in Compass, so you can quickly and efficiently produce FDS documents for your clients.
This is done by creating templates of your various service packages using Managed Field Content.
Finding the Managed Field Content field
In all of the wizards in Compass, the Managed Field Content field name is listed in the Help Menu on each applicable page.
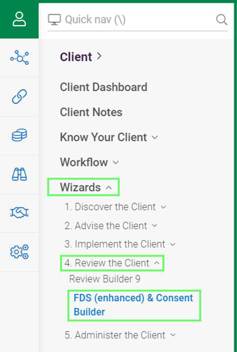
To find the FDS (enhanced) & Consent Builder Managed Field Content field name please go into your client record, Client > Wizards > 4. Review the Client > FDS (enhanced) & Consent Builder.
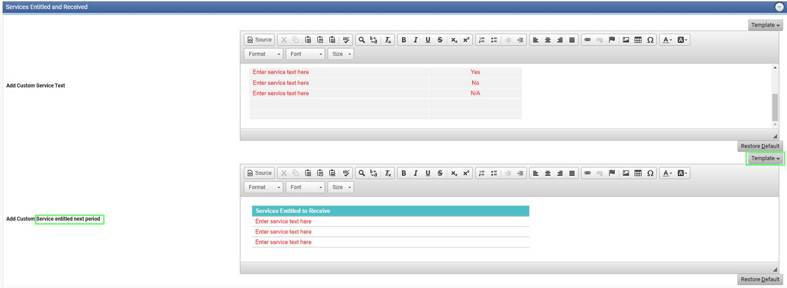
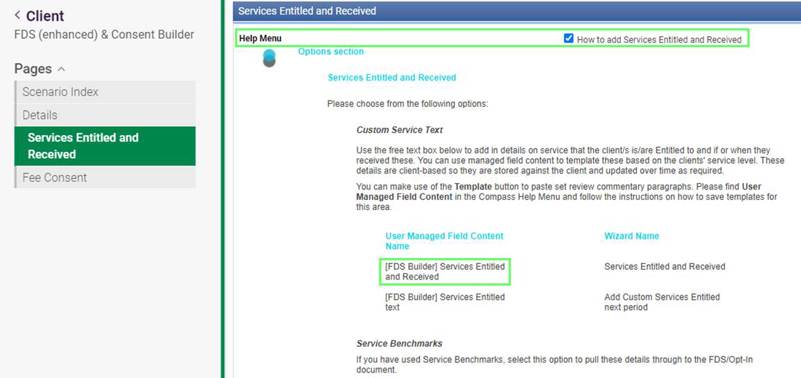
Create/Open your scenario, Navigate to the Services Entitled & Received Page, tick to open the Help Menu. Below you will see 2 Managed Field Content Names, in this example we will create a template for Services Entitled and Received.
Creating Your Service Package, Managed Field Content Templates
- Go to Admin > Interface > Managed Field Content
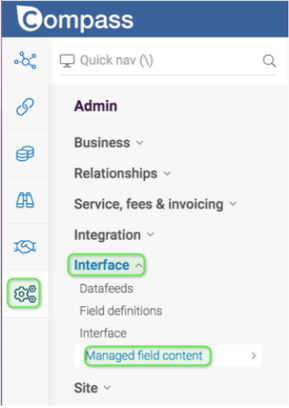
- Search the field name (Ctrl + F) and type in [FDS Builder] Services Entitled & Received as this will highlight the field you need. Click on the field > Scroll down > Click Add.

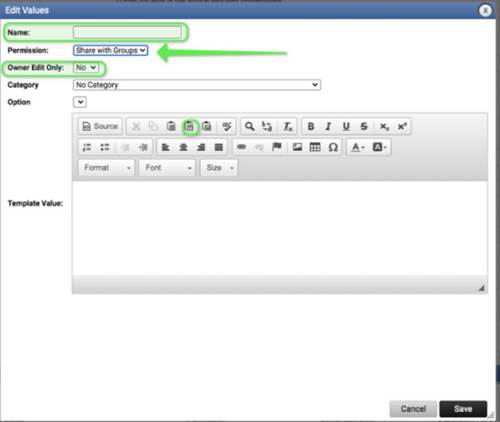
3.When adding your template text, ensure you do the following:
a. Name: Give your template a name
b. Permission: Mark as ‘Share with Groups’ so that everyone in your practice will be able to see the template.
c. Owner Edit Only: Mark ‘No’ if you would like others in your practice to be able to edit the template. ‘Yes’ if you do not want others to edit your template.
d. Template Value: If you are copy and pasting text please use the ‘paste as plain text’ option (highlighted in the screenshot below).
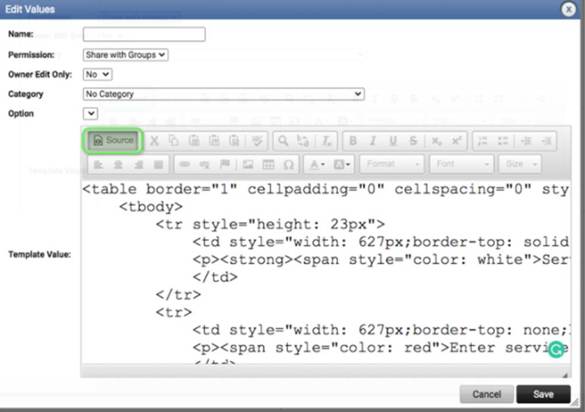
- If you would like to add a table into your template, you can do so by clicking on Source and copy & paste the below code into the Template Value

|
<table border="1" cellpadding="0" cellspacing="0" style="margin-left: 5.4pt;border-collapse: collapse;border: none"> |
- Once the code has been pasted into the Template Value field, click Source
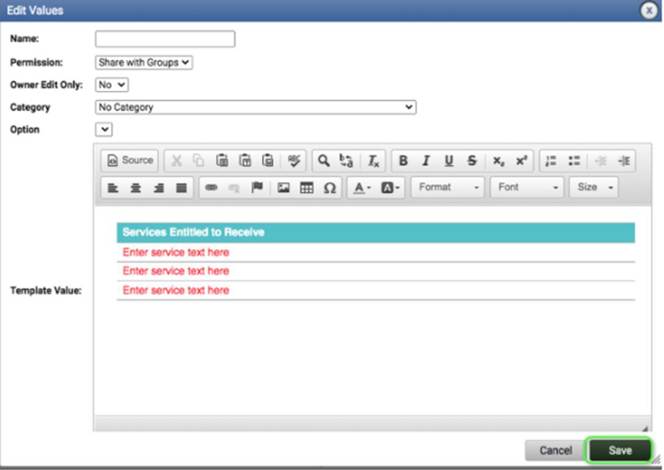
- You will then see the table and you can add your service package template text as applicable.
- Once you have created your Services Entitled and Received Managed Field Content, next time you go into your FDS (enhanced) & Consent Builder scenario, please click the Template button in the wizard to select your service package template.
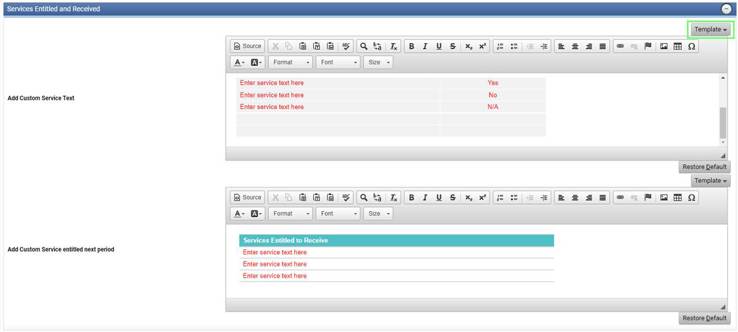
- Please repeat the above steps to create your Service Entitled Next Period Managed Field Content template.