Preferences | Setting up My Preferences
Overview
There a range of preferences that you can control to change some aspects of the user experience within Xplan. By setting up your preferences correctly according to your role early on, you can make it easier to navigate around the site. Below is a guide to the preferences that are available in Xplan and a recommended setting for each.
Account Preferences
From the top right corner of Xplan Click on Preferences

From the left hand side menu, Click on Account and there will be a list of item that you can configure as per below:
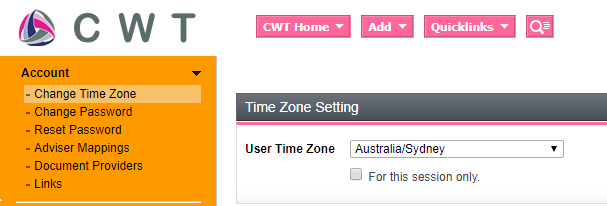
Change Time Zone
Select the Time Zone that matches the location of your office. This is set up for all new users automatically, however can be adjusted if you were to be relocated.
Change Password
See Separate Guide in the Document Library - Changing Your Password & Password Reset
Reset Password
See Separate Guide in the Document Library - Changing Your Password & Password Reset
Adviser Mappings
Nothing to change, this page lists all your adviser mappings used for Datafeeds.
Document Providers
Nothing to Change, we don’t use this module.
Links
Nothing to change, we don’t use this functionality.
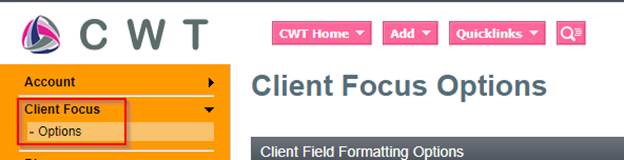
Client Focus Options
On the left hand side menu click on Client Focus then Options
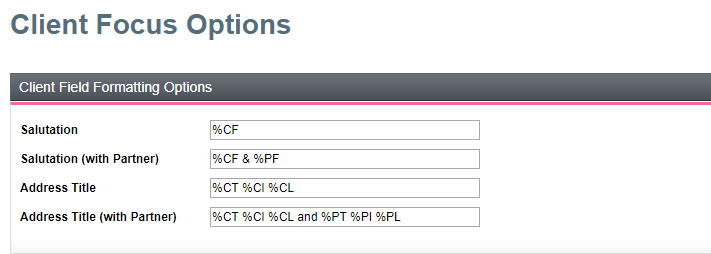
Client Field Formatting Options
The text in the Address Title and Salutation fields can be automatically generated based on system wide and individual user settings, or manually entered.
You can enter custom options for the following fields, our recommendations are in the table and image below:
| Field Name | Suggested Setting |
| Salutation | %CP |
| Salutation (with Partner) | %CP & %PP |
| Address Title | %CT %CI %CL |
| Address Title (with Partner) | %CT %CI %CL and %PT %PI %PL |
Example:
| Field tags | Output | |
| Salutation | %CT %CF %CL | Mr John Public |
| Salutation (with Partner) | %CT %CF %CL and %PT %PF %PL | Mr John Public and Miss Veronica Rice |
Usable tags for automatically generating text
The generated field content can use the following tags:
| Tag | Inserted text |
| %CT | Client's title |
| %CF | Client's first name |
| %CP | Client's preferred name |
| %CM | Client's middle name |
| %CL | Client's last name |
| %CE | Client's entity name |
| %CI | Client's initials |
| %PT | Partner's title |
| %PF | Partner's first name |
| %PP | Partner's preferred name |
| %PM | Partner's middle name |
| %PL | Partner's last name |
| %PE | Partner's entity name |
| %PI | Partner's initials |
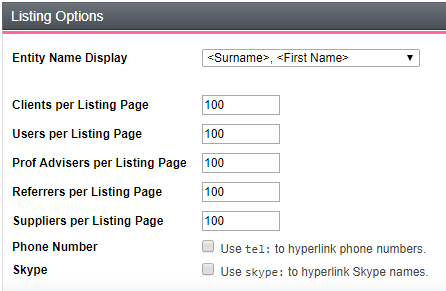
Listing Options
Entity Name Display - How names are formatted in client Lists
Entities Per Listing Page - How many results are listed on each page (default 100)
Phone Number - Use Tel. for Phone Number - displays a telephone icon for the client's preferred telephone number. The icon can be clicked to dial a client when using web or IP based telephony. While we do not test or directly support external telephone system, if a system honours the IE dial tag (tel:) it should work correctly. This option does not apply until your next user session, which can be initiated by logging out and in to XPLAN.
IP telephony can also be accessed from the client Contact page. To use IP telephony with stored telephone contacts
Skype - When ticked Skype contacts display as a HTML link, which can be clicked to connect via Skype. To use Skype contacts
This option does not apply until your next user session, which can be initiated by logging out and in to XPLAN.
Client Search Defaults
Tick the Entity Status checkboxes to be include by default when you generate a client List.

These defaults also control which entities are visible when using IMAP. Clients are always visible via IMAP, while entities that are not Clients will only be visible if set to an Entity Status that is ticked as a default search option.
Fields on Client Focus Title
The heading on Client Focus pages typically displays:
Client name and partner name (Category, Planners Name).

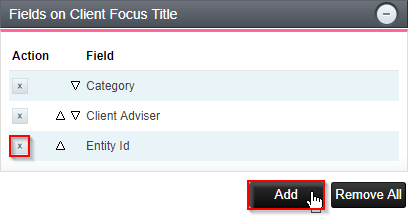
Users have the option to change what additional information is displayed here by removing the fields and clicking on  or clicking on Add to customize the output to your preference.
You can then use the 
![]() buttons to change the order that the fields will be displayed in the title.
buttons to change the order that the fields will be displayed in the title.
Diary
A range of Diary options are available if you choose to use the Xplan Diary.
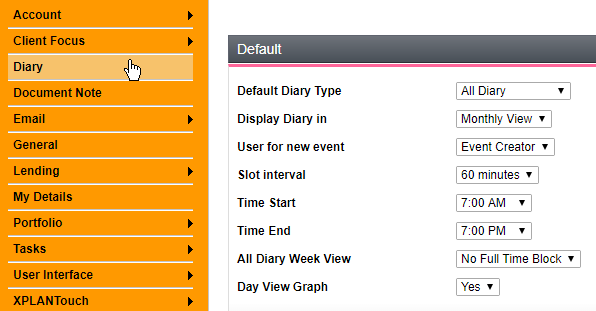
Default
Default Diary Type - Which page initially displays when you access the diary
Display Diary in - Default display in either Monthly View, Weekly View or Today View
User for new event - The default user when you create an event
Slot Interval - Size of displayed time slots
Time Start - The default start time to show up to in Today View
Time End - The default start time to show up to in Today View
All Diary Week View - Allows for time blocks to be included in Weekly view
Day View Graph - A graphical representation of daily events within the Daily view
Reminder
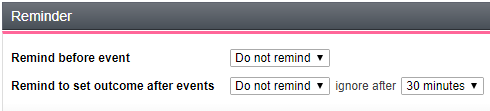
Reminder before events - An event reminder popup can display when you are logged in and viewing a page.
Reminder to set outcome after events - A reminder can be set to display after an event has completed to remind you to set an event's outcome.
Display Multiple Users in All Diary Day View
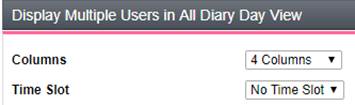
Columns - When viewing multiple user diaries in Daily view, this sets the number of columns the diaries are displayed in
Time Slot - Individual user's time slots can be hidden to reduce the amount of information on screen.
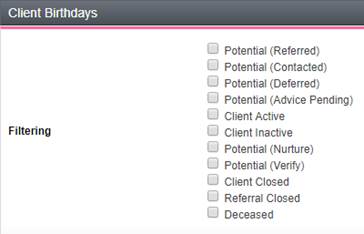
Client Birthdays
Tick the client category checkboxes to select which client birthdays should display in your diary.
VCard

VCards are a file format standard for electronic business cards.
Receive Client's vCard in Email Notification - Select Yes for your email notifications to include a vCard for each client attending the event.
Document Note
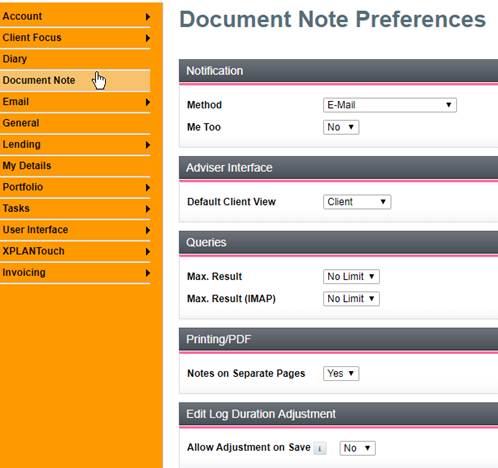
Notification
Method - When another user creates or modifies a note for one of your clients, this setting controls how you are notified of this
Me Too - If set to Yes, you will receive notifications for notes that you have created or modified.
Adviser Interface
Default Client View - when viewing notes in a client, set which notes display.
We recommend this be set to Both
Queries
Max Results - Restricts the number of results displayed by a document search
We recommend this be set to No Limit
 |
Max Results is also applied to CSV exporting of Notes data from the Client List. For example, when set to 50 only data on 50 Notes will export for each entity |
Max Results (IMAP) - Restricts the number of results displayed when viewing a folder via IMAP
We recommend this be set to No Limit
Printing/PDF
Notes on Separate Pages - When printing/generating a PDF from multiple notes, select to have notes on separate pages or compile them together.
Edit Log Duration Adjustment
Allow Adjust on Save - When set to Yes you can manually change the saved duration of work when editing a Note, which is logged to the note Edit Log when a Note is saved. For a client Note, this is also saved as a User Time Taken entry.
When Allow Adjust on Save is set to No the User Time Taken entry is automatically saved with a period of from when the Note was opened to when it is saved.
See Separate Guide - Changing your signature in Xplan
General
Nothing for a user to change, this is controlled at a system level
Lending
Nothing to change, we don’t use this functionality.
My Details
Contact Details
Displays the current information Xplan has recorded against your user profile.
Soft Dollar Benefits Register
See Separate Guide - Soft Dollar Benefits Register / Small Benefits Register
No Contact Register
Nothing to change, we don’t use this functionality
Portfolio
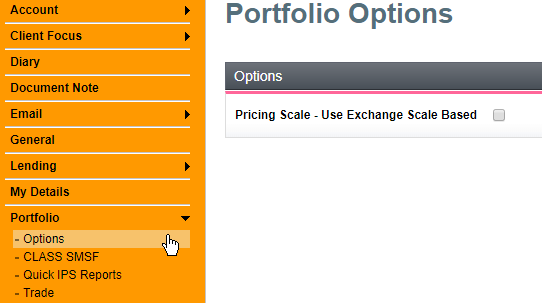
Options
Nothing to change, we don’t use this functionality.
Class SMSF
Nothing to change, we don’t use this functionality.
Quick IPS Reports
Quick IPS Reports allows you to create bundles of IPS reports, which can then be quickly run against a client.
We do not currently support this feature. For further details please click Help in the top right hand corner of Xplan and then search for 'Quick IPS'.
Trade
Nothing to change, we don’t use this functionality.
Tasks
Preferences
You can set the default view preferences in the Task list for each Category of Tasks.
Preferences
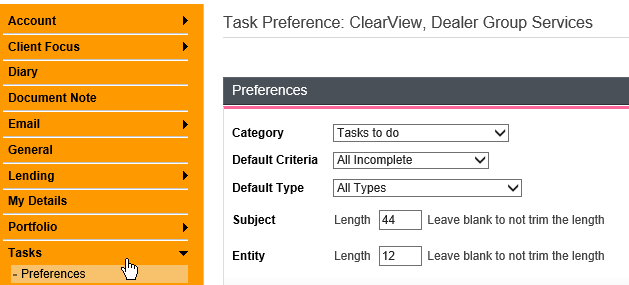
Category - Select a Category to edit. The current preferences for the selected Category are shown
Default Type - Select the Type filter shown by default for the selected Category
Subject - The length of the Subjects shown for the selected Category
Entity - The length of Entity names shown for the selected Category
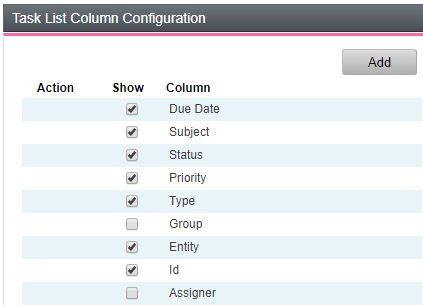
Task List Column & Sorting Configuration
Set the order that Tasks display. Ordering is based on the row order and the Sort Order of each row. This will mean you can see the information you want to see each time.
 |
 |
You can drag and drop the column labels to reorder the task list columns. Click Add to add non-standard fields to the table.
Miscellaneous
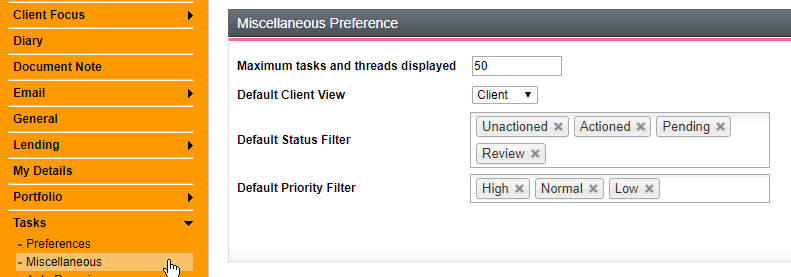
Maximum Tasks and Threads displayed - Number of tasks listed in the Task area
Default Client View - When viewing client tasks, this sets which entity's tasks display by default
Default Status Filter - Default settings for the Task Status filter
Default Priority Filter - Default settings for the Task Priority filter.
Auto Reassign
At times if may be necessary to reassign a user's Tasks for a period, such as when a user is on leave.
When a Task auto reassign rule is activated, any Tasks created or saved for you after activation will be reassigned. Any other Tasks will be reassign by a background XPLAN process at midnight.
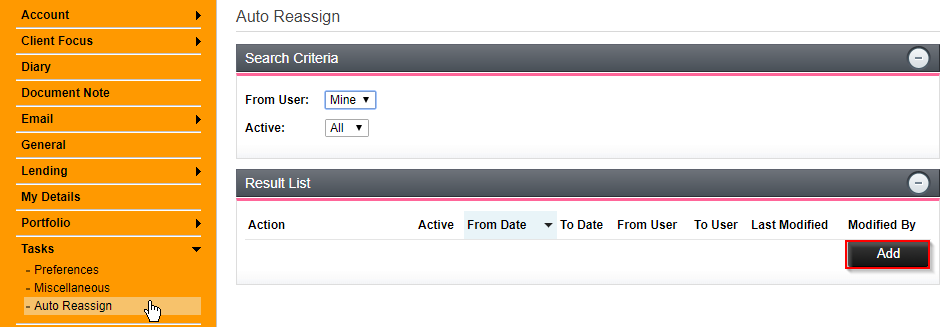
Set the criteria to control the list of your existing Task auto reassign rules to be displayed.
To create a new Task auto reassign rule:
Click Add. The Edit Auto Reassign page displays as seen in the image below:

Active - set whether the rule will be active.
From Date - for the period that the rule will reassign Tasks for when active.
To Date - for the period that the rule will reassign Tasks for when active.
From User - select the user who's Tasks will be reassigned.
To User - select the user who will be reassign your Tasks.
Click Save.
Edit an existing Task auto reassign rule:
Click ![]() for a Task reassign rule. The Edit Auto Reassign page displays. (as per above)
for a Task reassign rule. The Edit Auto Reassign page displays. (as per above)
Make changes as required. Click Save.
Remove an existing Task auto reassign rule:
Click  for a Task reassign rule. The rule is deleted.
Note: Reassigned Tasks are not automatically assigned back to the original adviser when the reassign period has completed.
User Interface
Dictionary
The Rich Text Editor in Xplan allows you to run a spell check against inputted text. The spell checker uses an internal dictionary, which may not include some terms that you wish to use. You can add words to custom dictionaries.
Custom Dictionaries
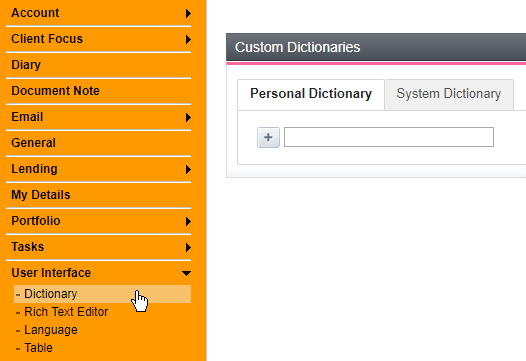
Personal Dictionary - Words in your Personal Dictionary will only be used by Xplan when you run a spell check. To add a word to the dictionary:
Enter the word you want to add to the dictionary.
Click . The word is added to the dictionary.
System Dictionary - Nothing for a user to change, this is controlled at a system level.
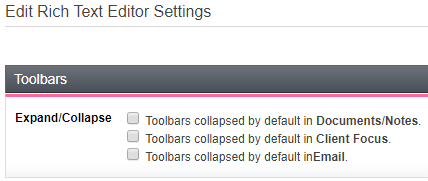
Rich Text Editor
Text fields that support rich text display the rich text editor toolbar. There can be a slight pause while all of the rich text icons are loaded. As many short notes may not require rich text, or may use a preformatted template, the toolbar can be hidden when loading the text editor.
Language
You should not change this setting, Xplan is setup to use English (Australian).
Table
The table settings are only applicable for the Portfolio Dashboard
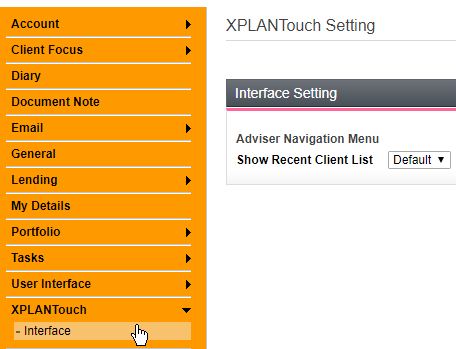
Xplan Touch
Select weather you want a list of recent clients to show when you use Touch version of the software.
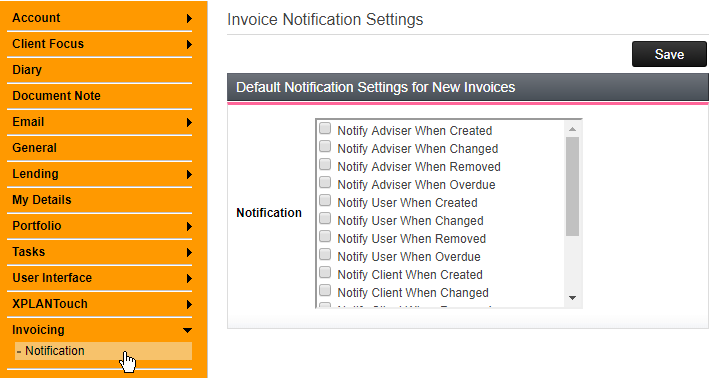
Invoicing
Allows you to add default settings regarding notifications for new invoices