Risk Researcher Manual
Overview
Risk Researcher is a comprehensive research tool providing qualitative and quantitative analysis of personal risk insurance products. It allows for comparisons of product features, prices and packages whilst satisfying compliance requirements of product comparison.
Accessing Risk Researcher
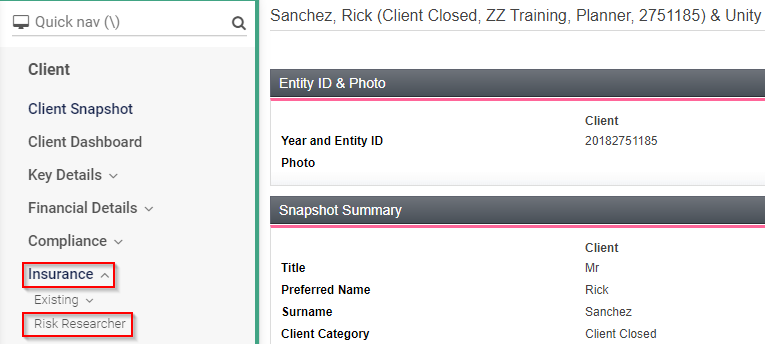
Risk Researcher should be run through the clients profile in order to keep a record of the research and also for the information to be able to flow through into the SoA or RoA. Once you have navigated to your client, you can access Risk Researcher as per the below image:
Premium Modelling
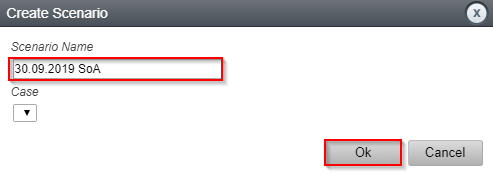
This will take you to the Premium modelling area. Click on Create Scenario to create a scenario and start with your research:

You will need to enter a name for the new Scenario. The “Created” and “Modified” dates will always appear next to the scenario name. As such for future reference we would suggest that your scenario includes the types of cover or amounts you’re recommending so it will be easy to identify later. Eg: 31.10.2018 SoA Increase Life Cover. Once you have named your scenario click the Ok button.
This will take you to the Details screen where the personal details of the client and partner will be pre-filled assuming that the information from the Fact Find has already been entered into the system.

Clicking the ![]() button next to the Occupation field enables you to view a cross reference for the occupation codes.
button next to the Occupation field enables you to view a cross reference for the occupation codes.


There are two tabs to the Occupation Cross Reference. The first, Cross Reference, allows you to view all of the codes for all of the insurance providers and, if desired, update the occupation codes by clicking on the relevant column in the Use line. The second tab, Occupation Class, allows you to view the occupation class for the occupation that you have selected for all available providers.
Linking Existing Cover
If you are doing a review for a client’s existing cover or a replacement, you will first need to link their existing cover in the Current Situation Section under the Existing tab. You can do this by clicking on the drop down box in the Action column and select Review:

![]() Once you have selected Review, a new window will come up for you to choose cover type (as per the below image). The underwriter and package should default to their respective Products however it would be worth checking before you select the cover type. Once you have confirmed the Underwriter and Package is correct, click on the tick box next the appropriate cover type, then click on Link:
Once you have selected Review, a new window will come up for you to choose cover type (as per the below image). The underwriter and package should default to their respective Products however it would be worth checking before you select the cover type. Once you have confirmed the Underwriter and Package is correct, click on the tick box next the appropriate cover type, then click on Link:
Although there is an Add Existing Cover option available to add any cover you may have forgotten to in Client Focus, this will not work properly in Risk Researcher.
If the Review option is not coming up, it may be a result of the underlying factors not matching with the Product Provider and Risk Researcher. Eg: Premium frequency according to Risk Researcher might be yearly but with the Product Provider it is monthly etc. This can be updated in Client Focus and a new scenario will need to be created to continue.

Once successfully linked, the linking symbol ![]() next to the cover and will be added to the Cover Selection area as part of the recommendation:
next to the cover and will be added to the Cover Selection area as part of the recommendation:

Once the cover has been added to Cover Selection, although there is an option edit the cover , this should be left alone as its pulling through the existing cover that was linked.
The Needs Analysis
Please refer to the Risk Researcher - Needs Analysis for more information regarding this Section in Risk Researcher.
Adding New/Varying Cover
As part of your recommendation to the client, you may wish to increase any of the existing cover/s that they have or apply for brand new cover. This can be achieved in the Cover Selection area by clicking on ![]() or
or ![]() . By selecting
. By selecting ![]() it will copy all the options and features of the cover type.
it will copy all the options and features of the cover type.

If you click on ![]() you will then be taken to the page below where you can fill in the appropriate details if they are to be different to the current benefit structure (i.e. Life Insured, Sum Insured, Stepped or Level Premiums) and cover options:
you will then be taken to the page below where you can fill in the appropriate details if they are to be different to the current benefit structure (i.e. Life Insured, Sum Insured, Stepped or Level Premiums) and cover options:

 For the Life Options section at the bottom, selecting Yes for these options will limit the insurances that display in the Premium Estimates screen to policies with those features.
Once you have entered the desired cover, Click the Save button to go back to the previous page to add in more insurances or the Save & Quote button to go directly to the Premium Estimates page.

Adding New/Linked Cover
To add linked or brand new cover, under cover selection, select the linked cover option you would like from the Select Cover Required dropdown box then click the ![]() button.
button.

Adding Flexi-Linked Cover
To add Flexi-Linked cover, first add the linked cover you require and in the details page (as per the above image) change the Flexi-Linked drop-down box for the TPD and/or Trauma options that are Flexi-Linked from No to Yes.
![]() To add Super-linked TPD (any portion of TPD held inside super, own portion help outside super) update the TPD Definition to Super-linked.
To add Super-linked TPD (any portion of TPD held inside super, own portion help outside super) update the TPD Definition to Super-linked.

If you are recommending Income Protection Cover, this can be Packaged in the Premium Estimates screen.
 The cover options allow you set additional options such as the frequency for the different product types and premium projections.
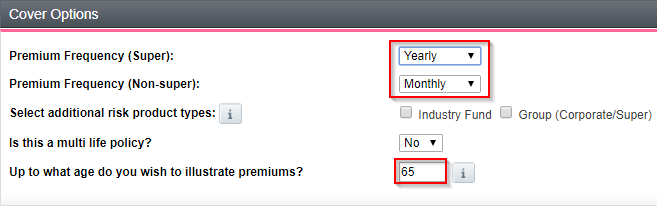
The premium illustration will default to 65, please ensure that this is a future date relative to clients age
Global Options
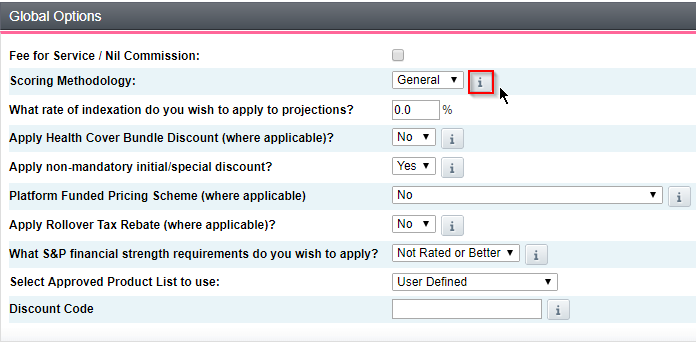
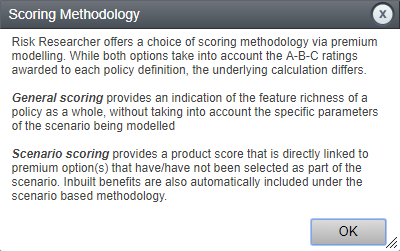
In the Global Options panel you can set various options for the insurance covers you have added.
For more information about what the options mean, you can click on ![]() and a pop-up will appear with the details of that selection.
and a pop-up will appear with the details of that selection.
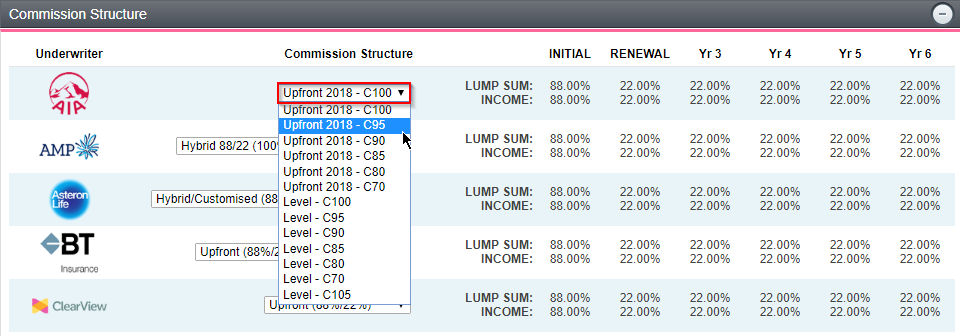
Commission Structure
You are also able to select the commission structure for the various product providers. These are set at a Dealer Group level by default however you can change the structure to best suit your recommendation to the client
Premium Estimates
All policies matching your requirements will be displayed on the Premium Estimates screen and will automatically quote/requote the cover you have inputted on the Cover Selection page:

- First select the tab for the cover type you are wishing to compare, as per the above this is for the Life Cover
- Under the Rec column, you can select the product you are comparing by clicking on Alt. Please make sure to compare similar cover types and options to make it a fair comparison.
- By selecting this tick box, it will unselect the remaining products and leave the ones you have recommended as per step 2. This will make it easier when generating a Product Comparison Report which will be shown later in this guide.
Repeat steps 1-3 for each of the different cover types
Premium Validation
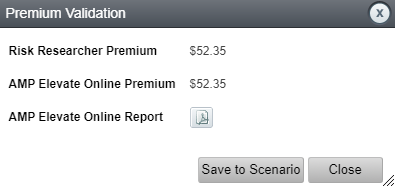
You can generate a quote through Premium Estimates screen by clicking on ![]() then Premium Validation
then Premium Validation

The below window will pop up once loaded and by clicking ![]() this will then download a PDF with the Premium.
this will then download a PDF with the Premium.
![]() You should also prepare/organise quotes directly with the vendor to ensure the figures in Risk Researcher match correctly for what is being presented to the client
You should also prepare/organise quotes directly with the vendor to ensure the figures in Risk Researcher match correctly for what is being presented to the client
Packaging Insurance Cover
![]() When multiple types of cover are modelled, the Package tab lists the packages that meet all required coverage. In this case we could look at package options for Life /Trauma and Income Protection by clicking the Package – Client name tab:
When multiple types of cover are modelled, the Package tab lists the packages that meet all required coverage. In this case we could look at package options for Life /Trauma and Income Protection by clicking the Package – Client name tab:

![]() As per the highlight above, this is the clients’ current insurance cover. Make sure to select only the new cover you are quoting.
As per the highlight above, this is the clients’ current insurance cover. Make sure to select only the new cover you are quoting.
If you would like to edit the sum insured while in Premium Estimates, you can click on
Select the covers you would like to package, then click on Apply to display the available packages:

You can run a comparison report (Compare Ratings report) for each individual type of cover or package that you are recommending and save to filing for research
Generating Reports
Product Comparison Report
Generating a Product Comparison Report will fulfil your compliance requirement to compare at least three policies prior to recommending insurance. To generate the report, first select the tab relating to the Cover type, then click on the Actions button then Compare Ratings:

You will then be taken to this page where you can select the different Product Providers. If you have completed step 3 in the Premium Estimates section, only the recommended products should appear:

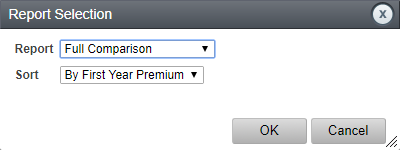
Once you have selected Report, you will then see the below pop up. Choose the desired output then click on OK.
There will be a PDF document that will generate and download which should appear on the bottom left of the page. When you open it should be as below:

The Compare Features report is merged through into the Annexure if selected in the SoA Wizard
Compliance - Saving Research to filing
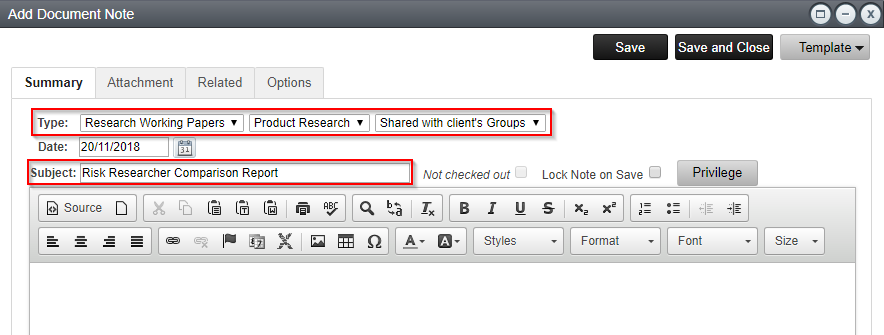
After generating the Product Comparison Report you should save it against the client in Xplan in Activities > Filing or Filing, then clicking on Add:

In the Type drop down select Research Working Papers then the adjacent drop down for the Sub type as Product Research and the permission setting to be Shared with client’s groups. Add in a subject eg: ‘Risk Researcher Comparison Report’ or similar:
Stepped vs Level Premium or Agreed vs Indemnity Comparison
If you would like to generate a Premium Comparison showing the Stepped vs Level projection or for Income Protection an Agreed vs Indemnity graph you can do so through the Premium Estimates screen:

- Navigate to the Premium Estimates screen
- Select the tab relating to the cover type
- Click on the required product so the Additional Information reads the selected product
- Click on Charts
- Choose either Stepped vs Level or if the cover is Income Protection - Agreed vs Indemnity
The Stepped vs Level and Agreed vs Indemnity Reports will not work in the under Package option
You will be navigated to this page where by selecting Report you can generate the graph as a PDF:
Recommending a Product
When you have identified a product that suits your client's needs you can recommend it by clicking on the Rec box against the product in the Rec column. When you have multiple tabs of Premium Estimates you can recommend a single product from each list or just one product in the Package tab. Then select Next


You will then be taken automatically to the Fees page where you can edit any commission amounts for the cover. After you have entered in and confirmed any changes, click on Save and Close:
If you wish to make another change to the Fees, you can do so by click on the Actions button then Fee Disclosure and that will redirect to the page in the above image. You can also amend the premium if there is a mismatch by clicking on ![]() .
.
Once the commission amounts have been entered you can now finalise the Recommendation/s of cover for the client:

Status:
- Hold: will keep the existing cover in place as it is without any changes
- Vary: this will take you to the page below where you can manually edit the existing covers Premium and Sum Insured. This can be used if the client wishes to reduce their cover and have a quote already from the Product Provider
If there is cover that isn’t being amended, you will need to put $0 in the rest of the Covers under Sum Insured

- Exclude: will not include that policy in the output of the SoA
- Recommend and Acquire: Selecting anything other than Recommend and Acquire will not merge the Recommendations into the SoA
- Replace: will tag the coding in the SoA to merge replacement details relating to the existing and proposed covers. If you are replacing a product then you will need to complete a Replacement Advice. Change the Status to Replace > Actions > Replacement Advice

You will then be taken to the below page. Select the product that is going to replace the current policy and click on the Differences in Benefits tab. If there are any features being gained or lost, tick the box on the first line of the heading to select all the differences in features for both gained and lost. You may complete the other tab which are free texts fields if you like, then click Save and Close:


Record:
For the purposes of the SoA, you will need to leave the traffic light as ![]() in order to merge the Recommendations. The other options perform the below actions and do not merge into the SoA:
in order to merge the Recommendations. The other options perform the below actions and do not merge into the SoA:
Record: Policy has been Recorded, but not Implemented. This will result in the policy being created in the clients Xplan profile under Insurance > Existing > By Cover with policy status ‘Recommended’.
Record and Edit: As above but will navigate you to the Existing page in Edit mode
Implement: Policy has been implemented. This will result in the policy being created in the clients Xplan profile under Insurance > Existing > By Cover with policy status ‘Inforce’.
Implement and Edit: As above but will navigate you to the Existing page in Edit mode
![]() If you have an Insurance DataFeed set up for any of the Product Providers that is already feeding an account that is inforce through in the Insurance > Existing > By Cover, by selecting select Record or Implement this will produce a duplicate account
If you have an Insurance DataFeed set up for any of the Product Providers that is already feeding an account that is inforce through in the Insurance > Existing > By Cover, by selecting select Record or Implement this will produce a duplicate account