How to model an Interest Rate Increase / Loan Refinancing
When modelling an interest rate increase/refinancing of an existing loan, there are 2 ways to complete the process:
- Basic: Apply a blanket Interest Rate increase to all liabilities in the scenario See Modelling Option A
- Pro: Faster modelling, no additional loan entries
- Cons: Unable to only apply to certain liabilities & unable to set certain loans increasing at certain times
- Advanced: Customise when loans are refinancing for increase and at what time See Modelling Option B
- Pro: Customise when the loan interest rate increase applies, and applying differing interest rate increases
- Cons: Additional data entry with duplicate loan entries & requires work in both ‘Input’ and ‘Display’ sections
Modelling Option A
To apply an interest rate increase across all liabilities, after setting up your scenario, navigate to ‘Input -> What if’ then across to the ‘Interest Rate Change’ tab. From this tab you are able to set the following parameters:
- Include in Projection – Controls if factored into projection, allowing ability to turn on and off without delete the data entry and then re-completing
- Rate Change – Additional amount to decrease or increase all loans by, noting this will add to or reduce from the current interest rates Noting if you select a reduction amount that results in the loan having a zero or negative interest rate, Xtools+ will completely payout the loan during that financial year
- From & To – Select dates you wish to have this take effect from and to in the modelling, noting if you create a Key Date you will also be able to select from the list.
- Apply another Interest Rate Change – This allows you to setup a second interest rate change, in-case you wish to show an initial increase then a reduction of the increase amount further along
- Apply an Interest Rate Change to Deeming Rate – This allows you to also apply the rate change to the Deeming Rate along with the Liabilities rate
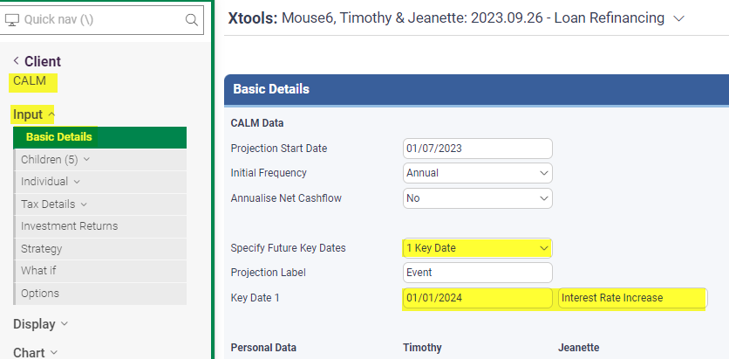
Setting up a key date:
‘Input -> Basic Details’
Entering a Key date and updating label to reflect ‘Interest Rate Increase’
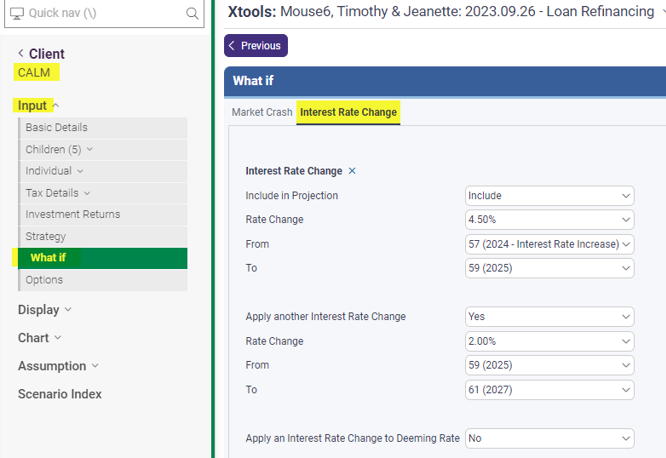
Updating the ‘What if’ section:
‘Input -> What if’ Then across to the ‘Interest Rate Change’ tab
Noting in the below example we have applied an increase amount of +4.5% to be added to the originally entered liability rate of 2.5% (totalling 7.00%), then steps down to an increase of +2.00% for the next 3 financial years, then reduces down to standard 2.50%.
Verifying output listed:
‘Display -> Individual -> Liabilities -> Client’ (or respective entity page for who holds the loan being reviewed)

Modelling Option B
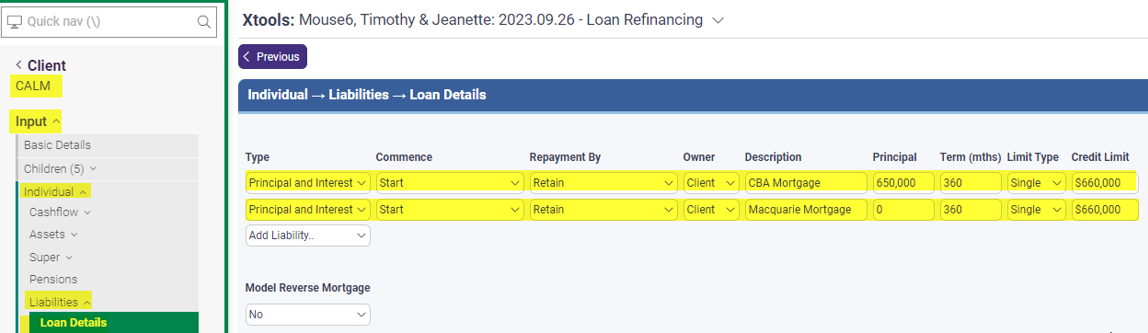
After setting up your base modelling, if you wish to Key Dates can also be entered, then we need to navigate to ‘Input -> Individual -> Liabilities’: Initially you will have entered a single loan per each current loan, for the Loans you wish to apply the increase to, you need to enter a second loan similar to the screenshot below:
Noting, in the screenshot, the CBA Mortgage is the existing loan and the Macquarie Mortgage will be the refinancing loan, you will need to update the following:
- Type – For proposed loan update if need be
- Commence – leave at start
- Repayment By – update per your preference, for the existing loan we leave as ‘Retain’ as we will be paying out the existing loan and drawing down the new refinancing loan in the display table
- Principal – for the refinancing loan, leave as zero as this is controlled in display table
- Credit Limit – must be entered for the refinancing loan or else drawdown will not work
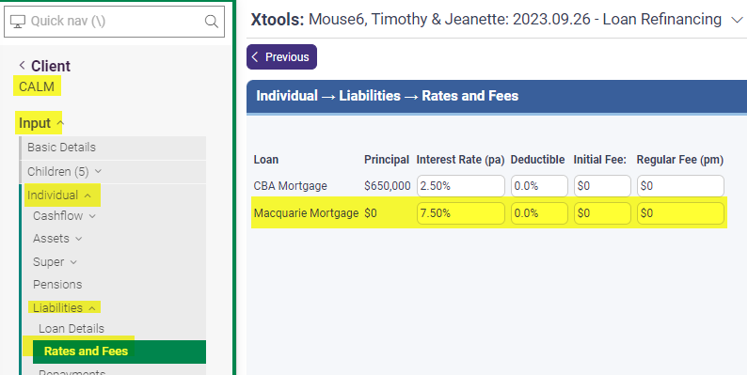
Next navigate to ‘Input -> Individual -> Liabilities -> Rates and Fees’
- Update fields accordingly for the refinancing loans
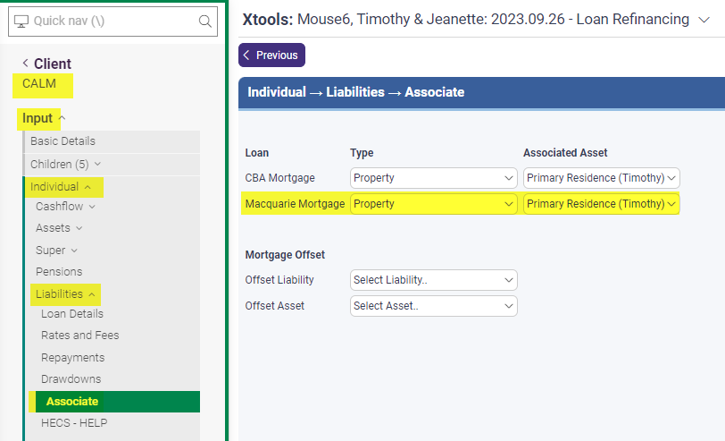
Next navigate to ‘Input -> Individual -> Liabilities -> Associate’
- Create the link between the refinancing loan and the Associated Asset to allow LVR reporting
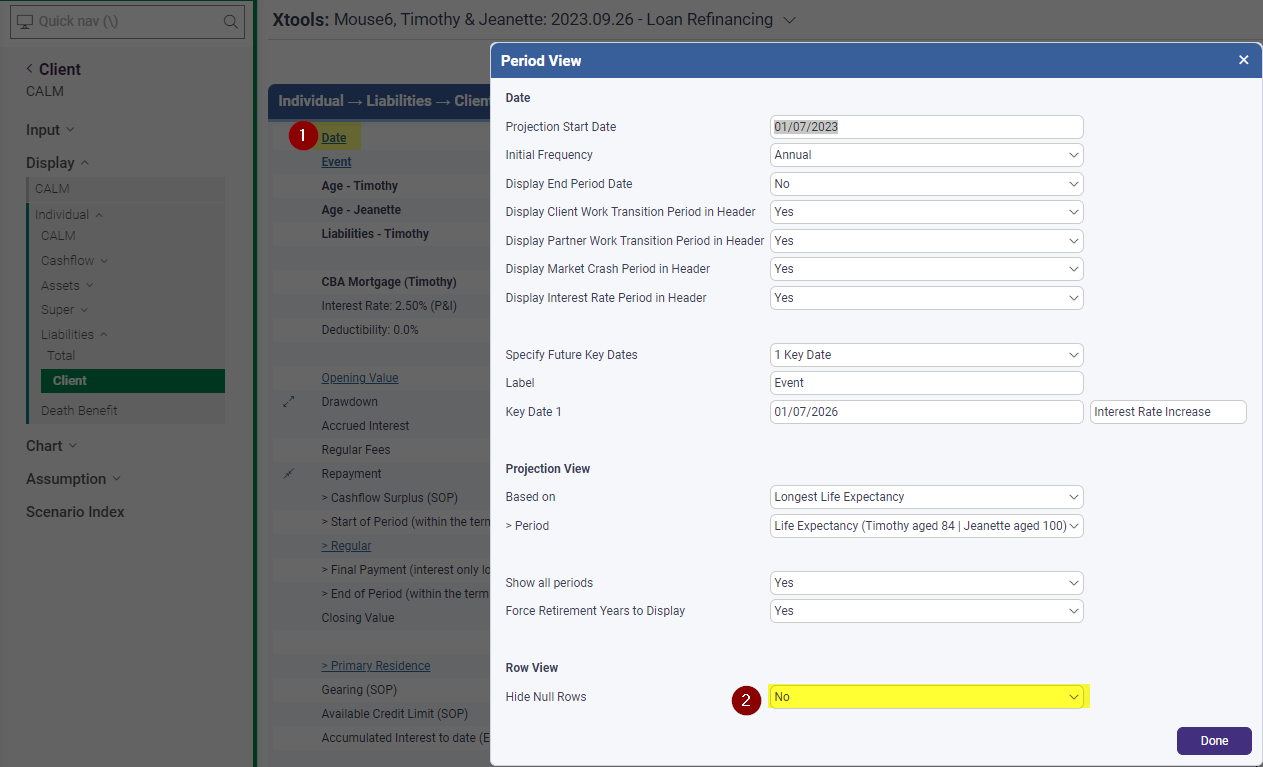
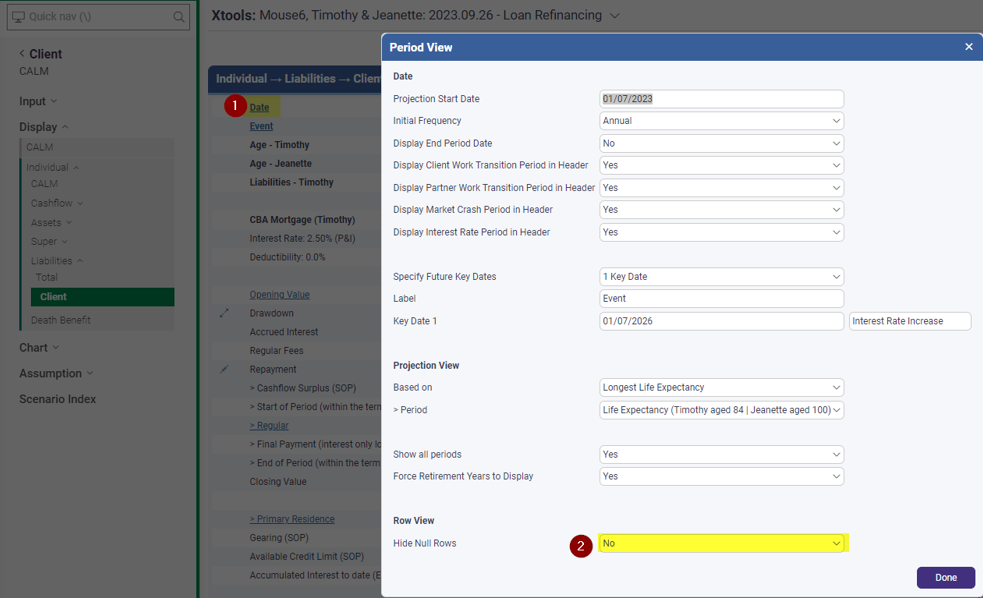
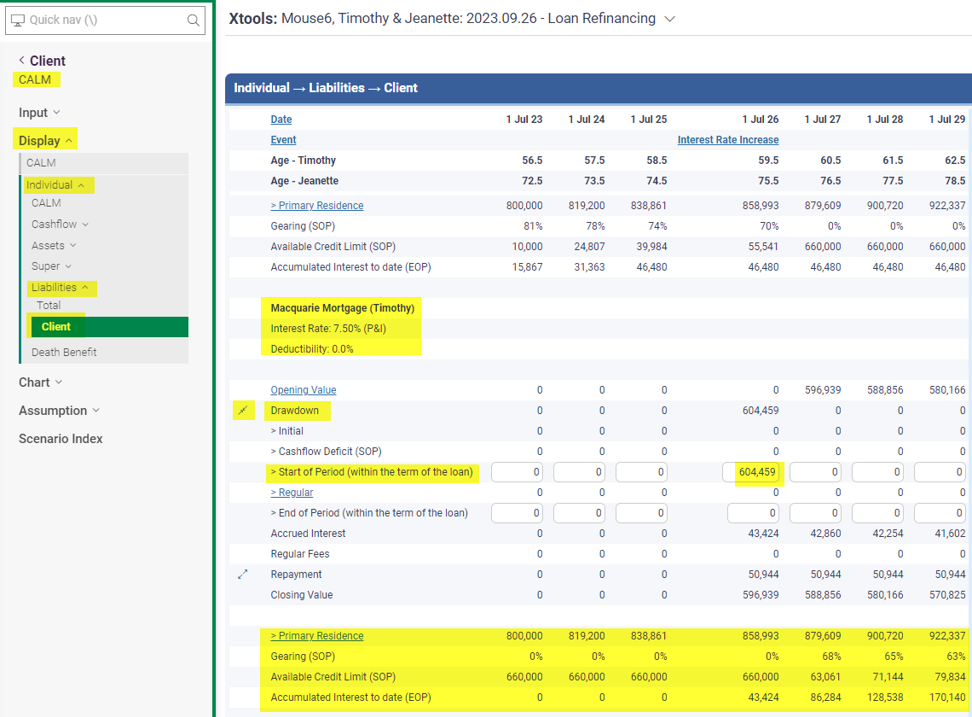
We are now ready for the final part in actioning the repayment of the existing loan and the drawdown of the refinancing loan: Navigate to ‘Display -> Individual -> Liabilities -> Client’ (or entity that holds the respective loans)
- When on the display screen, first press ‘Date’ (top left) and ensure ‘Hide Null Rows’ is marked as ‘No’, this will allow you to see the blank rows to perform the next actions
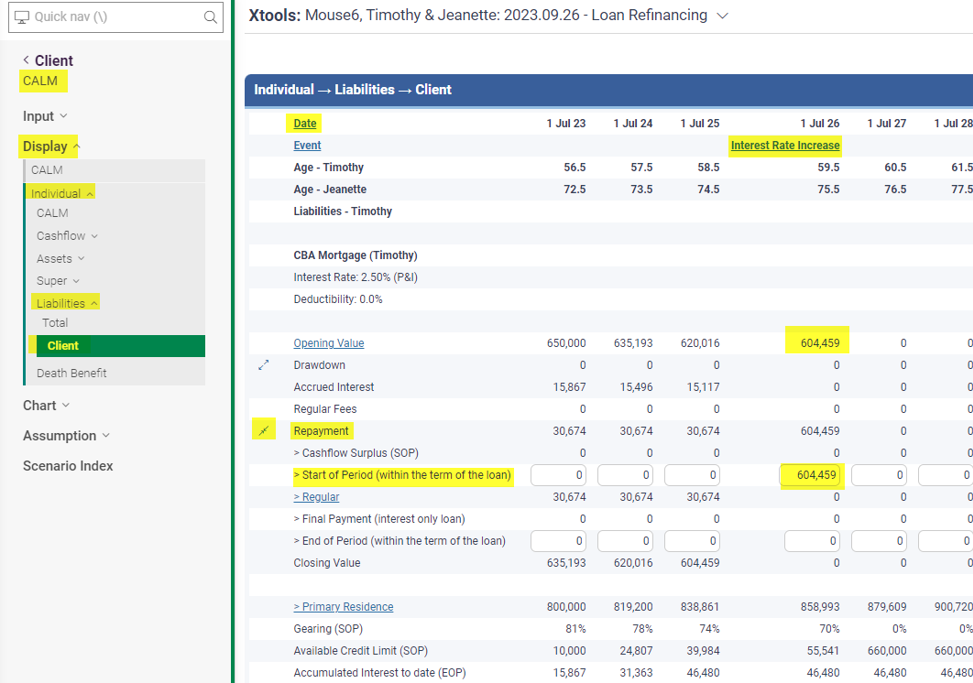
- Locate the existing loan that is being refinanced, then expand the ‘Repayment’ rows by press the icon to the left of the name, then locate ‘Start of Period’ or ‘End of Period’ at your preference. This will be the timing of when the loan is repaid. We have then entered the same value as the ‘Opening Value’ into the ‘Start of Period’ value, or when using ‘End of Period’ copy the value currently reported as ‘Closing Balance’, as after entering the amount into the respective time period (this example Start of Period 01/07/2026), the loan will then be fully paid out continuing forward:
- Next, navigate further down the page or across to the new refinancing loans display page, then expand the ‘Drawdown’ row, and locate the ‘Start of Period’ or ‘End of Period’ field and enter the same value as entered above, into the same respective time period (Year and Start/End of Period): You will also note, at the bottom of the new refinancing loan, after the values have refreshed by pressing ‘Enter’ on your keyboard, the Primary Residence LVR is also being reported, as we have linked both the existing and the refinancing loans to the Primary Residence asset.
Published by Joshua Heath