Archiving or Offboarding a Client Using the Wizard
Archiving or Offboarding a Client Using the Wizard
13/11/2025
The Archive/Offboarding Client Wizard has been introduced to help advisers and administrators efficiently manage the process of archiving clients in line with the latest Deceased Client licensee standards.
This tool is designed to ensure compliance and consistency when a client relationship ends, whether due to the client’s passing, separation or divorce, opting out, or choosing not to proceed.
By following the steps in this wizard, users can be confident that all regulatory, communication, and documentation requirements are met, and that sensitive client information is handled appropriately throughout the offboarding process.
Step-by-Step Process
- Access the Wizard
Navigate to Advice Wizards. Select 5. Administer the client and click Archive/Offboarding Client Wizard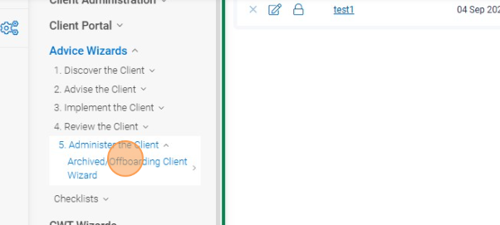
- Read All Instructions
Carefully read the introduction and all guidance text throughout the wizard. Each page contains important compliance and process details. - Select Reason for Archiving
In the Reasons for Archiving section, select the single most relevant reason (for example, Deceased, Opt Out, Not Proceeding, Separation/Divorce). Do not select multiple reasons, even if the system allows it. - Enter Departure Details
Specify the Client Departure Date and the Reason for Departure.
- Update Client Details
For deceased clients, update the Title to “Estate of [Client Name]”. Ensure all marketing permissions are set to “No” or “Do Not Contact” as per licensee standards. Untick all mailing types to prevent accidental future correspondence.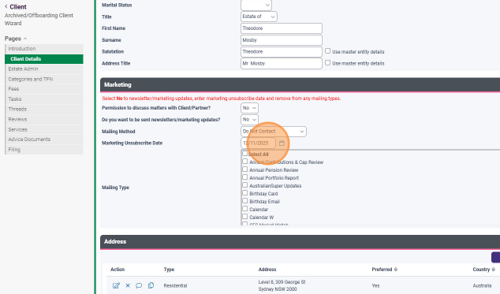
- Complete Estate Admin Checklist (Only For Deceased Client)
Answer all compliance questions as prompted. Ensure all required documents and notifications (such as death certificate, will, probate) are completed and uploaded.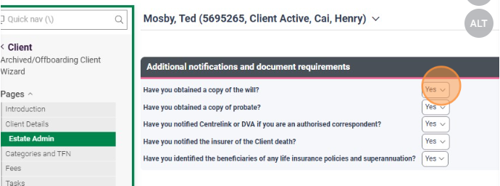
- Update Category & Entity Status
Change the Category to “Deceased” (for deceased clients) or “Client Closed/Archived” for other reasons. Update the Entity Status accordingly (for example, “Deceased” for deceased clients, “Archived” for opt-outs).
If you have a couple and only one of the entity is departing, please only change the Category and Status for that entity. This will ensure that as you separate the entity later on they are correctly categorised. - Manage Fees & Consent
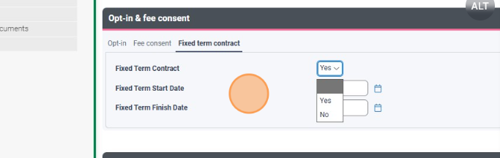
For departing clients, ensure ongoing fee agreements and fixed term fees are terminated. Set Consent Required to “No” and update or leave blank as appropriate. For fixed-term clients, update contract details and mark all relevant subscriptions as ceased.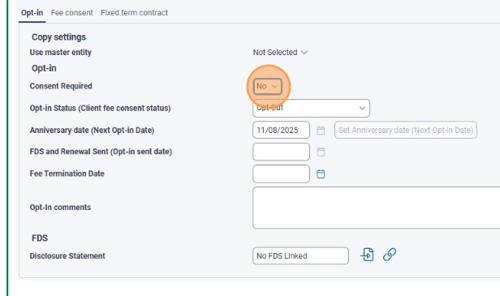
- Ensure all subscriptions are ceased
Check off all subscriptions that needs to be turned off, including client portal/access and direct debits.
- Finalise Outstanding Tasks/Threads
In the following Tasks and Thread section, complete or abort any outstanding tasks. In Threads and Workflows, ensure all workflow are finalised or closed. You may have to complete some final tasks and actions for the archived client, however this allows you to check if there are any action items that requires no further action.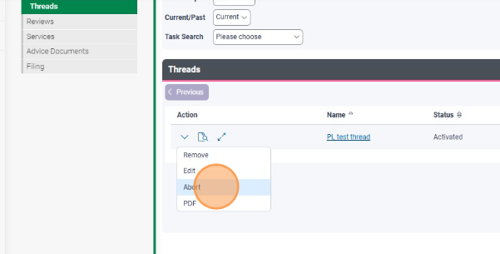
- Reviews & Services
Cancel or complete any upcoming reviews. Do not set up future reviews. Terminate any other services as required, and record end dates for users using Service Benchmarks.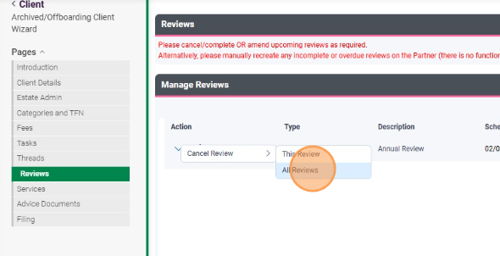
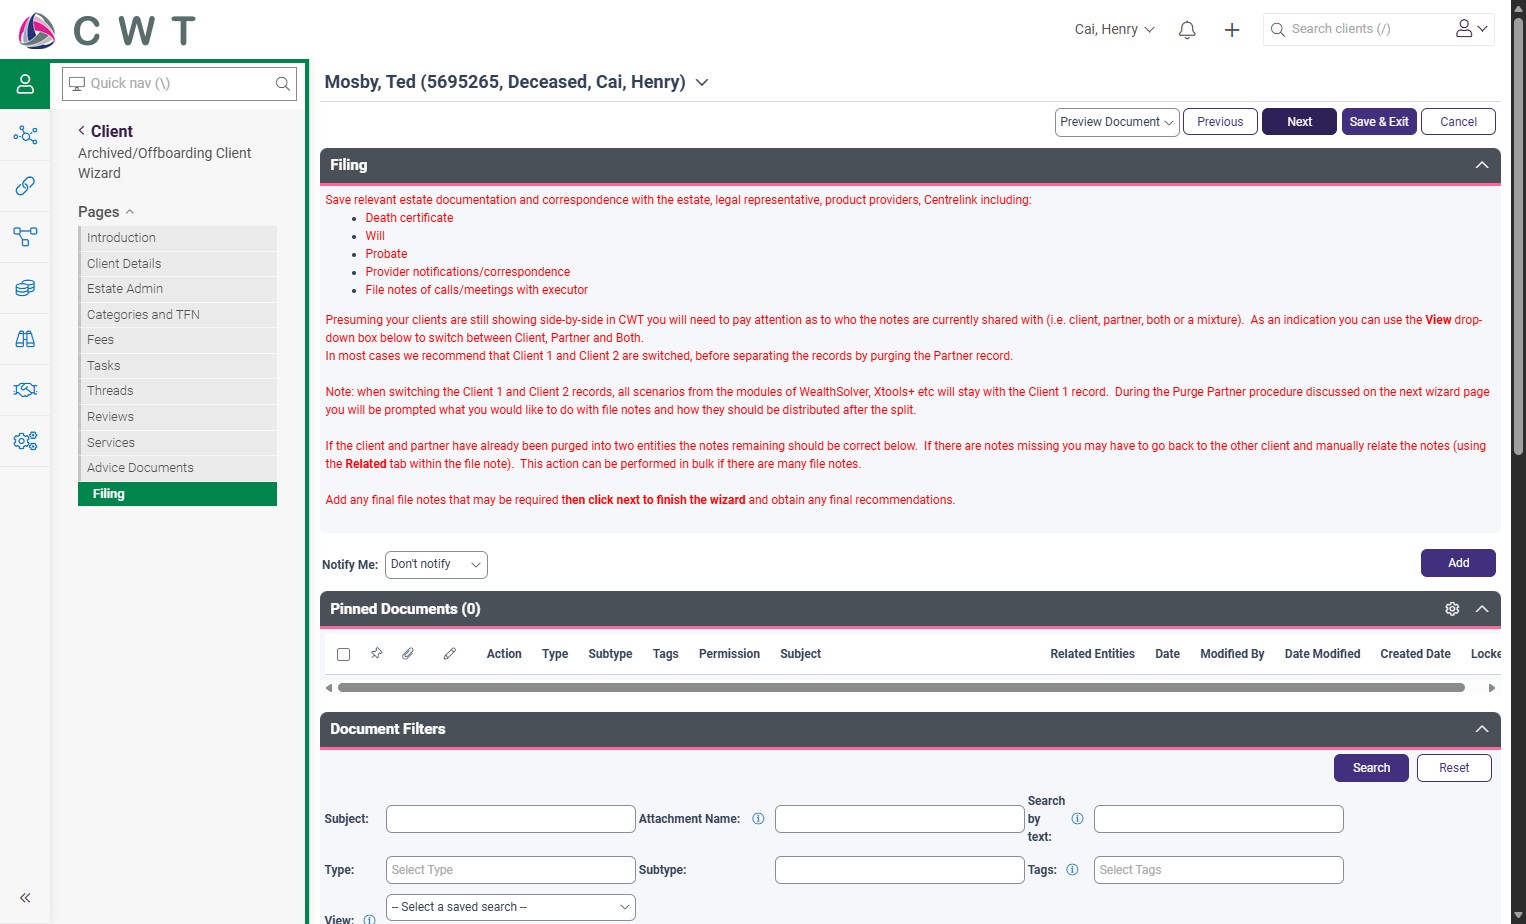
- Advice Documents & Filing
If there is a partner entity, copy all relevant SOA references as needed. Save all final notes, correspondence, and documentation (For deceased entity this will be death certificate, probate, executor meetings) in the document notes section.
- Final Steps
If needed, separate client and partner records. Revoke any online access for the client. Merge or archive checklists as appropriate.
Best Practice Reminders
- Always select only one reason for archiving.
- Double-check all marketing and contact permissions are disabled.
- Ensure all compliance checklists are fully completed.
- Save all supporting documents and notes in the client’s record.