Email | How do I add an image to an email template?
To add an image to an email or email template you must first upload the image to the document library or link to an url where the image is already uploaded to the internet such as on your website.
1. Upload the image to the document library
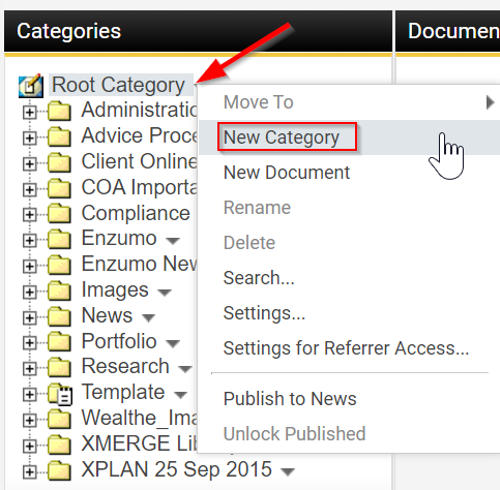
- Navigate to Notes & Documents
- If not already there, create a New Category to store your images by clicking on the arrow at the end of Root Category (or your practice name if a folder has been set up already) and choosing New Category
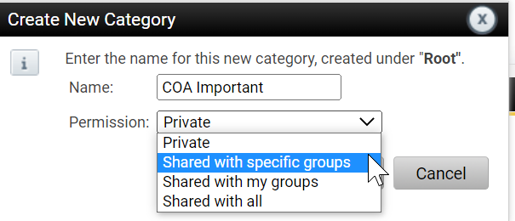
- Select the arrow at the end of your newly create category and set the permission to correctly show for your group or as required
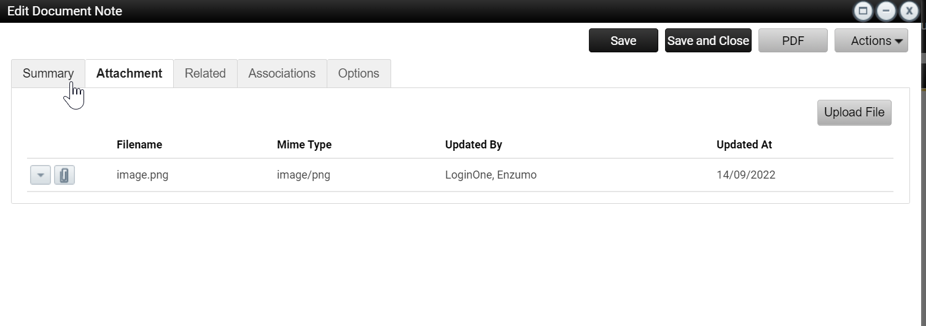
- Create a note as you would normally with note types and subtypes and a subject
- Upload your image as an attachment and save
2. Add the image to your email template
- From your email template select the Insert Image icon from the toolbar
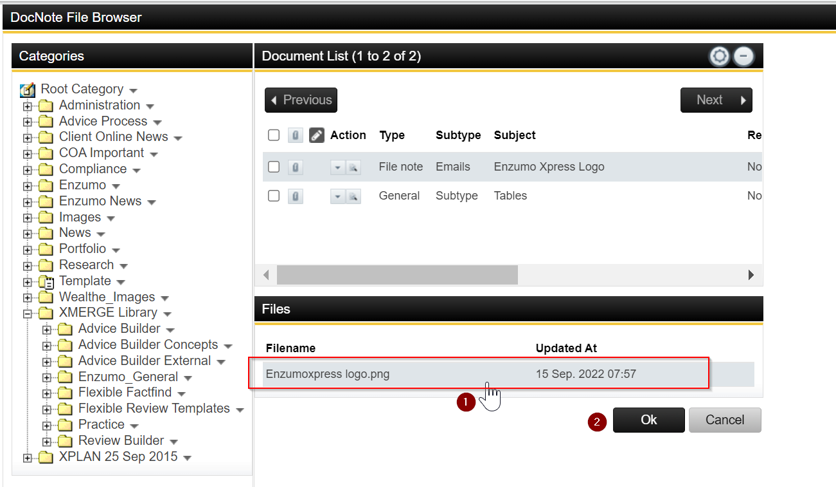
- Select Browse - the document library folder structure will open
- Navigate to the document note where you saved your image
- Click on the note itself then select the attached image
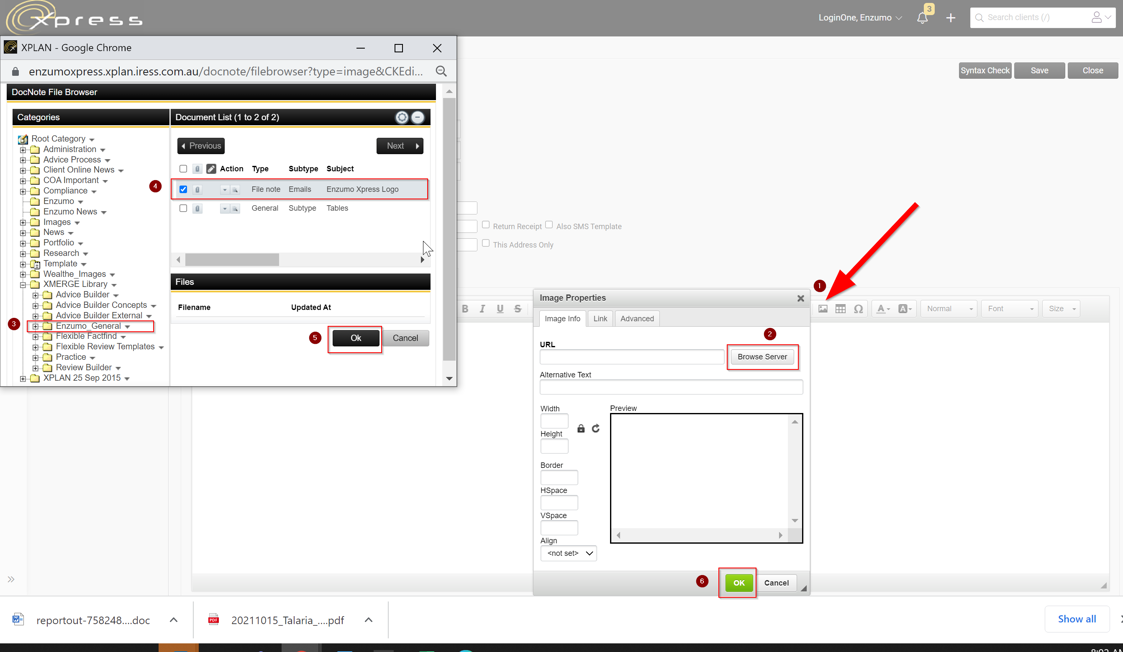
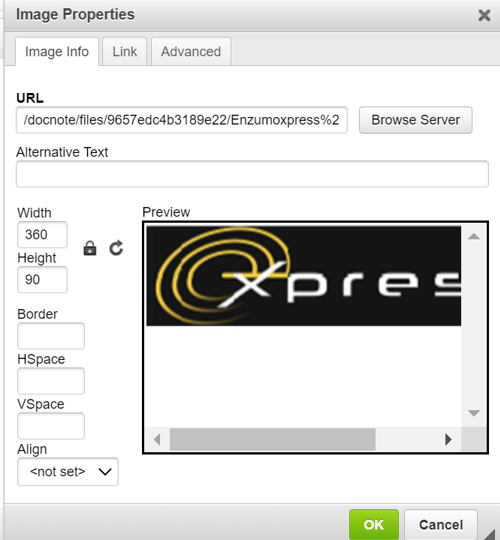
- The image will appear and can be resized. Click OK
The image will now appear in the email template.